Spectra Analyze App for Splunk SOAR Installation Guide
Overview
This guide will describe the process of installing and configuring the ReversingLabs Spectra Analyze app for Splunk SOAR.
Prerequisites
Before you begin, ensure you have:
- A Splunk SOAR on-prem or Splunk SOAR Cloud instance versions 6.3 or 6.2
- Administrator access to your Splunk environment
- A valid splunk.com username and password
- A ReversingLabs Spectra Analyze URL
- A valid ReversingLabs Spectra Analyze API token
Installation Steps
- Log in to your Splunk SOAR instance as an administrator
- Navigate to "Apps"
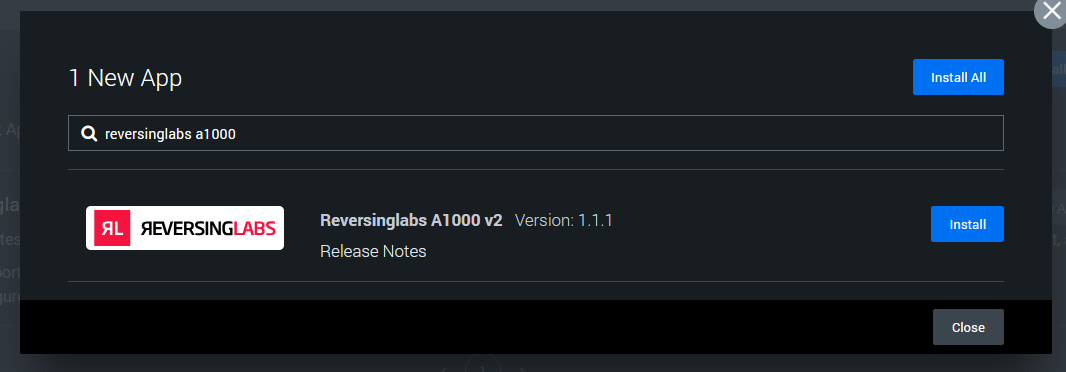
- Select "New Apps"
- Enter "ReversingLabs" in the search box
- Click "Install" next to "ReversingLabs A1000 v2"
Configuration Steps
- Navigate to the "Unconfigured Apps" section
- Click "Configure New Asset"

- Enter a custom name for the asset
- Click "Asset Settings"
- Enter a valid Spectra Analyze URL in the "A1000 url" field
- Enter a valid Spectra Analyze API token in the "A1000 token" field
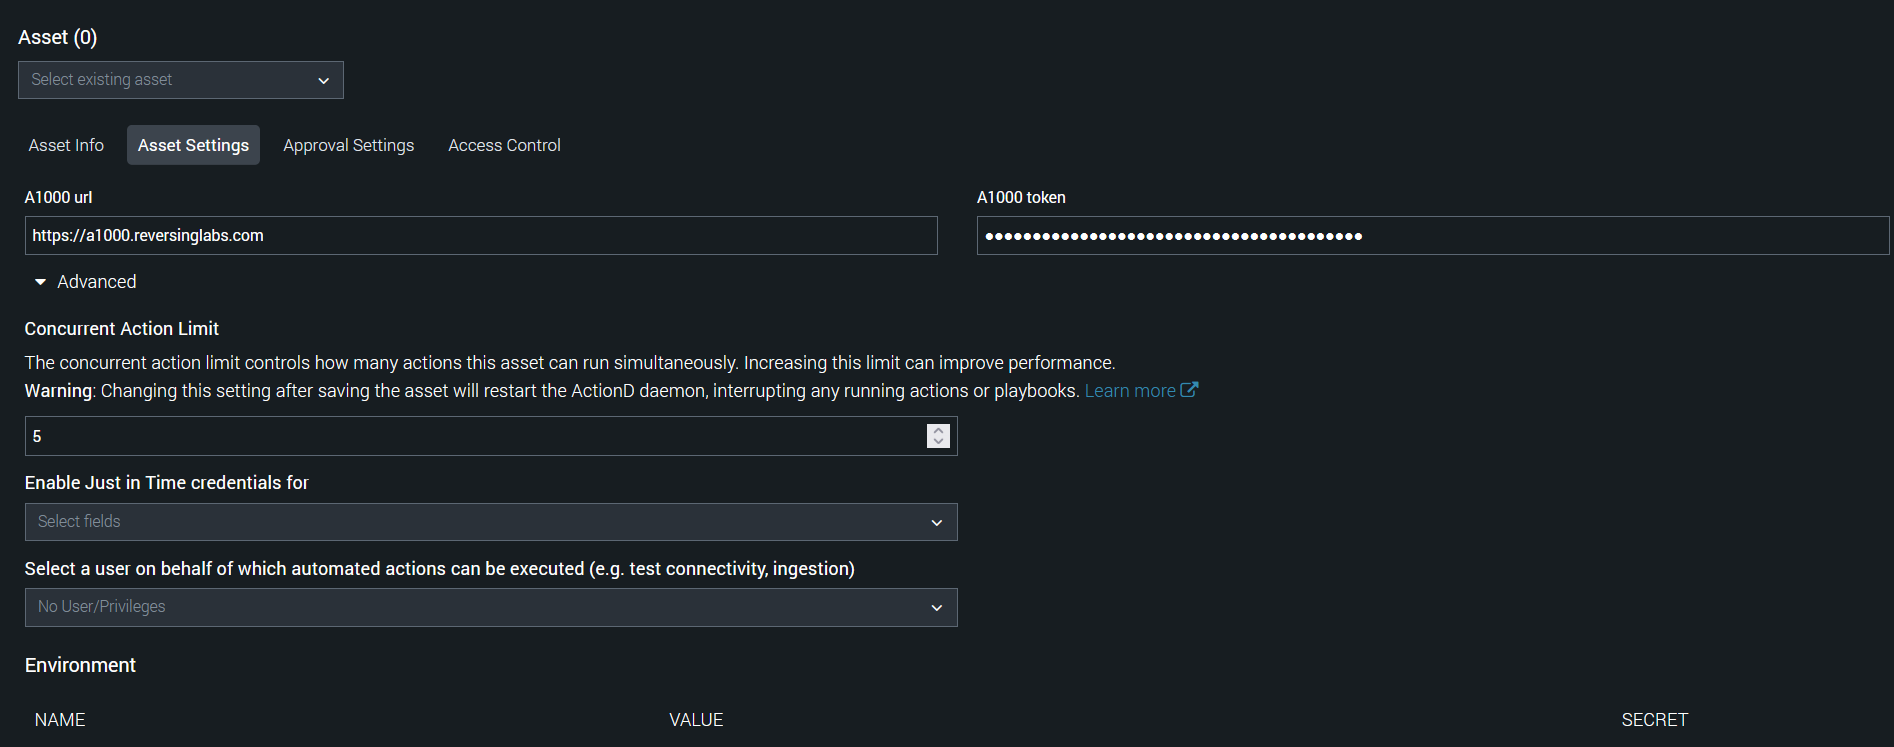
- Click the "Save" button"
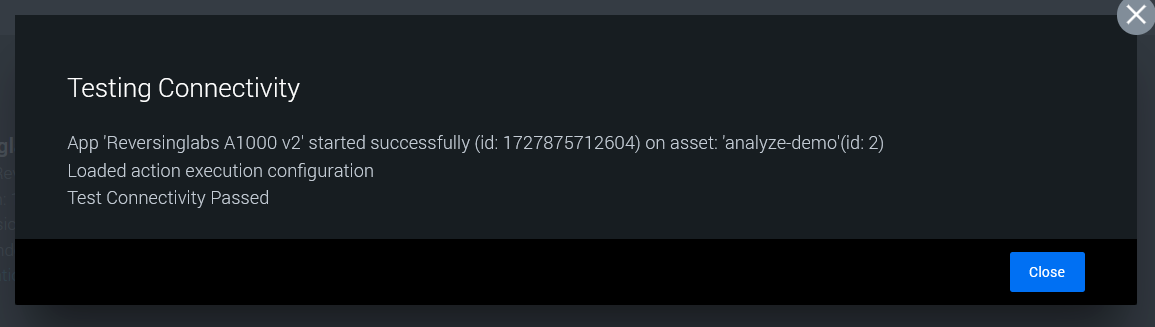
- Click the "Test Connectivity" button to validate the settings